


Android platform includes the SQLite embedded database and provides out of the box support to use it via Android APIs. In this tutorial we shall see how to get started with SQLite database in Android. SQLite is nothing but a relational database and our sql skills will help.
How to Use SQLite with Android?
To use SQLite in Android, a java class should be created as a sub class of SQLiteOpenHelper. This class will act as a database controller which will have the methods to perform the CRUD operations. This custom java class should override the methods named onCreate() and onUpgrade().
onCreate() method will be called for the first time when the Android application is run. First the database instance should be created using the method like getReadableDatabase() or getWritableDatabase() based on the type of access required. Android supports this method by providing in-built methods. For that, SQLiteQueryBuilder class should be imported.

An Example for SQLite Database with Android
Download Source of Android SQLite Database
Lets have three Android Activity for List, Add and Edit operations and ensure that these are declared in manifest file. And then we need to create subclass of SQLiteHelper to manage SQLite database.
Setup the Database
DBController.java is going to be our custom java class that will manage the SQLite database. We should extend SQLiteOpenHelper and override the essential methods. The constructor is the hook that will be used to setup the database. While running the Android application, the database will be created for the first time.
	public DBController(Context applicationcontext) {
		super(applicationcontext, "androidsqlite.db", null, 1);
		Log.d(LOGCAT,"Created");
	}
Initial Database Table Creation and Upgrade
SQLiteOpenHelper provides callback methods and we should override it to get our job done. Those callback methods that we can override are onCreate(), onUpgrade(), onOpen() and onDowngrade(). And onCreate() and onUpgrade() are abstract methods and must be overridden.
onCreate(SQLiteDatabase database) – is the method which is called first time when the database is created and we need to use this method to create the tables and populate it as per the need.
	@Override
	public void onCreate(SQLiteDatabase database) {
		String query;
		query = "CREATE TABLE animals ( animalId INTEGER PRIMARY KEY, animalName TEXT)";
		database.execSQL(query);
		Log.d(LOGCAT,"animals Created");
	}
onUpgrade(SQLiteDatabase db, int oldVersion, int newVersion) – is the method called when upgrade is done. We can drop the datbase and reset if required.
	@Override
	public void onUpgrade(SQLiteDatabase database, int version_old, int current_version) {
		String query;
		query = "DROP TABLE IF EXISTS animals";
		database.execSQL(query);
		onCreate(database);
	}
Create, Read, Update and Delete (CRUD) Operations
We shall have other user defined methods to handle the sql CRUD operations. The animals table will be created when the onCreate() method is invoked while installing the application. For performing operaations like insert, update, the SQLiteDatabase instance should be created using the methods like getReadableDatabase() or getWritableDatabase(). ContentValues() are used to pass values to the query.
Create
	public void insertAnimal(HashMap<String, String> queryValues) {
		SQLiteDatabase database = this.getWritableDatabase();
		ContentValues values = new ContentValues();
		values.put("animalName", queryValues.get("animalName"));
		database.insert("animals", null, values);
		database.close();
	}
Read
	public HashMap<String, String> getAnimalInfo(String id) {
		HashMap<String, String> wordList = new HashMap<String, String>();
		SQLiteDatabase database = this.getReadableDatabase();
		String selectQuery = "SELECT * FROM animals where animalId='"+id+"'";
		Cursor cursor = database.rawQuery(selectQuery, null);
		if (cursor.moveToFirst()) {
			do {
				wordList.put("animalName", cursor.getString(1));
			} while (cursor.moveToNext());
		}
		return wordList;
	}
Update
	public int updateAnimal(HashMap<String, String> queryValues) {
		SQLiteDatabase database = this.getWritableDatabase();
		ContentValues values = new ContentValues();
		values.put("animalName", queryValues.get("animalName"));
		return database.update("animals", values, "animalId" + " = ?", new String[] { queryValues.get("animalId") });
	}
Delete
	public void deleteAnimal(String id) {
		Log.d(LOGCAT,"delete");
		SQLiteDatabase database = this.getWritableDatabase();
		String deleteQuery = "DELETE FROM  animals where animalId='"+ id +"'";
		Log.d("query",deleteQuery);
		database.execSQL(deleteQuery);
	}
DBController.java
Complete code is as follows,
package com.javapapers.android.sqlitestorageoption;

import java.util.ArrayList;
import java.util.HashMap;

import android.util.Log;

import android.content.ContentValues;
import android.content.Context;
import android.database.Cursor;
import android.database.sqlite.SQLiteDatabase;
import android.database.sqlite.SQLiteOpenHelper;

public class DBController  extends SQLiteOpenHelper {
	private static final String LOGCAT = null;

	public DBController(Context applicationcontext) {
		super(applicationcontext, "androidsqlite.db", null, 1);
		Log.d(LOGCAT,"Created");
	}

	@Override
	public void onCreate(SQLiteDatabase database) {
		String query;
		query = "CREATE TABLE animals ( animalId INTEGER PRIMARY KEY, animalName TEXT)";
		database.execSQL(query);
		Log.d(LOGCAT,"animals Created");
	}
	@Override
	public void onUpgrade(SQLiteDatabase database, int version_old, int current_version) {
		String query;
		query = "DROP TABLE IF EXISTS animals";
		database.execSQL(query);
		onCreate(database);
	}

	public void insertAnimal(HashMap<String, String> queryValues) {
		SQLiteDatabase database = this.getWritableDatabase();
		ContentValues values = new ContentValues();
		values.put("animalName", queryValues.get("animalName"));
		database.insert("animals", null, values);
		database.close();
	}

	public int updateAnimal(HashMap<String, String> queryValues) {
		SQLiteDatabase database = this.getWritableDatabase();
		ContentValues values = new ContentValues();
		values.put("animalName", queryValues.get("animalName"));
		return database.update("animals", values, "animalId" + " = ?", new String[] { queryValues.get("animalId") });
	}

	public void deleteAnimal(String id) {
		Log.d(LOGCAT,"delete");
		SQLiteDatabase database = this.getWritableDatabase();
		String deleteQuery = "DELETE FROM  animals where animalId='"+ id +"'";
		Log.d("query",deleteQuery);
		database.execSQL(deleteQuery);
	}

	public ArrayList<HashMap<String, String>> getAllAnimals() {
		ArrayList<HashMap<String, String>> wordList;
		wordList = new ArrayList<HashMap<String, String>>();
		String selectQuery = "SELECT  * FROM animals";
		SQLiteDatabase database = this.getWritableDatabase();
		Cursor cursor = database.rawQuery(selectQuery, null);
		if (cursor.moveToFirst()) {
			do {
				HashMap<String, String> map = new HashMap<String, String>();
				map.put("animalId", cursor.getString(0));
				map.put("animalName", cursor.getString(1));
				wordList.add(map);
			} while (cursor.moveToNext());
		}
		return wordList;
	}

	public HashMap<String, String> getAnimalInfo(String id) {
		HashMap<String, String> wordList = new HashMap<String, String>();
		SQLiteDatabase database = this.getReadableDatabase();
		String selectQuery = "SELECT * FROM animals where animalId='"+id+"'";
		Cursor cursor = database.rawQuery(selectQuery, null);
		if (cursor.moveToFirst()) {
			do {
				wordList.put("animalName", cursor.getString(1));
			} while (cursor.moveToNext());
		}
		return wordList;
	}
}
NOTE: If you are interested only in the core database handling, with this the tutorial is over. What follows is, we are going to create a simple Android app which will provide user interface to operate on the database. Just giving a finishing touch to this database tutorial.
Launcher Activity
This activity will be launched first, on running this Android database application. The layout for this activity includes a ListView and its entry is supplied by the other xml file. This is done by the ListViewAdapter. The following xml files shows how to list data.
activity_main.xml
<RelativeLayout xmlns:android="http://schemas.android.com/apk/res/android"
    xmlns:tools="http://schemas.android.com/tools"
    android:layout_width="match_parent"
    android:layout_height="match_parent"
    tools:context=".MainActivity" >

    <RelativeLayout
        android:id="@+id/relativeLayout1"
        android:layout_width="fill_parent"
        android:layout_height="40dp"
        android:background="#000000"
        android:orientation="vertical" >

        <TextView
            android:id="@+id/textView1"
            android:layout_width="wrap_content"
            android:layout_height="wrap_content"
            android:layout_marginLeft="5dp"
            android:text="Animals"
            android:textAppearance="?android:attr/textAppearanceLarge"
            android:textColor="#FFFFFF" />

        <Button
            android:id="@+id/button1"
            android:layout_width="41dp"
            android:layout_height="40dp"
            android:layout_alignParentRight="true"
            android:layout_alignParentTop="true"
            android:background="#454545"
            android:onClick="showAddForm"
            android:text="+"
            android:textColor="#FFFFFF"
            android:textSize="30sp" />

    </RelativeLayout>
     <RelativeLayout
        android:id="@+id/relativeLayout1"
        android:layout_width="fill_parent"
        android:layout_height="match_parent"
        android:layout_alignParentLeft="true"
        android:layout_below="@+id/relativeLayout1"
        android:orientation="vertical"
        android:layout_marginTop="40dp">

    <ListView
         android:id="@android:id/list"
         android:layout_width="match_parent"
         android:layout_height="wrap_content"
         android:layout_alignParentLeft="true">
     </ListView>
     </RelativeLayout>

</RelativeLayout>
view_animal_entry.xml
<?xml version="1.0" encoding="utf-8"?>
<LinearLayout xmlns:android="http://schemas.android.com/apk/res/android"
    android:layout_width="fill_parent"
    android:layout_height="wrap_content"
    android:orientation="vertical" >
    	<TextView
        android:id="@+id/animalId"
        android:layout_width="fill_parent"
        android:layout_height="wrap_content"
        android:visibility="gone" />

       <TextView
           android:id="@+id/animalName"
           android:layout_width="fill_parent"
           android:layout_height="wrap_content"
           android:layout_marginBottom="5dp"
           android:layout_marginTop="5dp"
           android:paddingLeft="6dip"
           android:paddingTop="6dip"
           android:textColor="#A4C739"
           android:textSize="17sp"
           android:textStyle="bold" />

</LinearLayout>
After designing the layout, the list of animals will be retrieved from the database using the java class and it should be the sub class of ListActivity. Then the list of data will be loaded into the design layout using the list adapter as shown below..
ListAdapter adapter = new SimpleAdapter( MainActivity.this,animalList, R.layout.view_animal_entry, new String[] { "animalId","animalName"}, new int[] {R.id.animalId, R.id.animalName});
setListAdapter(adapter);
On clicking each item shown in the ListView, then we will be redirected to a separate layout edit or delete the selected list item. For that, OnItemClickListener should be set to the ListView instance. This will be done by the following code.
ListView lv = getListView();
lv.setOnItemClickListener(new OnItemClickListener() {
	@Override
	public void onItemClick(AdapterView<?> parent, View view,int position, long id) {
		animalId = (TextView) view.findViewById(R.id.animalId);
		String valAnimalId = animalId.getText().toString();
		Intent  objIndent = new Intent(getApplicationContext(),EditAnimal.class);
		objIndent.putExtra("animalId", valAnimalId);
		startActivity(objIndent);
	}
});
To add new entry into the animals database, we need to click the add icon shown at the top right corner of the animal list layout.
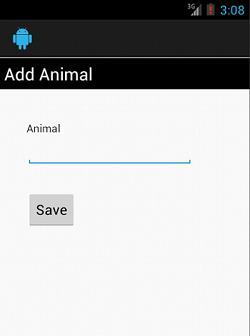
Add Activity
To Add new animal entry into the table, this activity is used. So the add layout should be designed with the list of widgets as shown as follows
add_new_animal.xml
<?xml version="1.0" encoding="utf-8"?>
<LinearLayout xmlns:android="http://schemas.android.com/apk/res/android"
android:layout_width="match_parent"
android:layout_height="match_parent"
android:background="#CCCCCC"
android:orientation="vertical"
android:paddingTop="1dp" >

<TextView
android:id="@+id/textView1"
android:layout_width="match_parent"
android:layout_height="wrap_content"
android:background="#000000"
android:padding="5dp"
android:text="Add Animal"
android:textAppearance="?android:attr/textAppearanceLarge"
android:textColor="#FFFFFF" />

<RelativeLayout
android:layout_width="match_parent"
android:layout_height="match_parent"
android:background="#FFFFFF"
android:orientation="vertical"
android:padding="10dp" >

<TextView
android:id="@+id/textView1"
android:layout_width="wrap_content"
android:layout_height="wrap_content"
android:layout_alignParentLeft="true"
android:layout_alignParentTop="true"
android:layout_marginLeft="24dp"
android:layout_marginTop="30dp"
android:text="Animal" />

<EditText
android:id="@+id/animalName"
android:layout_width="wrap_content"
android:layout_height="wrap_content"
android:layout_alignLeft="@+id/textView1"
android:layout_below="@+id/textView1"
android:ems="10" >

<requestFocus />
</EditText>
<Button
android:id="@+id/btnadd"
android:layout_width="wrap_content"
android:layout_height="wrap_content"
android:layout_alignLeft="@+id/animalName"
android:layout_below="@+id/animalName"
android:layout_marginTop="32dp"
android:text="Save"
android:onClick="addNewAnimal" />
</RelativeLayout>
</LinearLayout>
while clicking the save button, the following method will be invoked.
public void addNewAnimal(View view) {
	HashMap<String, String> queryValues =  new  HashMap<String, String>();
	queryValues.put("animalName", animalName.getText().toString());
	controller.insertAnimal(queryValues);
	this.callHomeActivity(view);
}
In this method, the content of TextView is read and put into hashmap to send as an argument of the DBController methods to perform insert. After insert, the launcher activity will be called to see the recently added item.
The entire logic for the add activity is as shown in the following code
Newanimal.java
package com.javapapers.android.sqlitestorageoption;

import java.util.ArrayList;
import java.util.Calendar;
import java.util.HashMap;
import java.util.List;
import java.util.Map.Entry;

import com.javapapers.android.sqlitestorageoption.R;

import android.app.Activity;
import android.content.Intent;
import android.os.Bundle;
import android.view.Menu;
import android.view.MenuInflater;
import android.view.MenuItem;
import android.view.View;
import android.widget.ArrayAdapter;
import android.widget.DatePicker;
import android.widget.EditText;
import android.widget.ListAdapter;
import android.widget.SimpleAdapter;
import android.widget.Spinner;


public class NewAnimal extends Activity{
	EditText animalName;
	DBController controller = new DBController(this);

	@Override
	public void onCreate(Bundle savedInstanceState) {
		super.onCreate(savedInstanceState);
		setContentView(R.layout.add_new_animal);
		animalName = (EditText) findViewById(R.id.animalName);
	}
	public void addNewAnimal(View view) {
		HashMap<String, String> queryValues =  new  HashMap<String, String>();
		queryValues.put("animalName", animalName.getText().toString());
		controller.insertAnimal(queryValues);
		this.callHomeActivity(view);
	}
	public void callHomeActivity(View view) {
		Intent objIntent = new Intent(getApplicationContext(), MainActivity.class);
		startActivity(objIntent);
	}
}
Edit Activity
It is similar to the add process, only difference is it displays the data from the database. The design and logic is shown by the following code.
activity_edit_animal.xml
<?xml version="1.0" encoding="utf-8"?>
<LinearLayout xmlns:android="http://schemas.android.com/apk/res/android"
android:layout_width="match_parent"
android:layout_height="match_parent"
android:background="#CCCCCC"
android:orientation="vertical"
android:paddingTop="1dp" >

<TextView
android:id="@+id/textView1"
android:layout_width="match_parent"
android:layout_height="wrap_content"
android:background="#000000"
android:padding="5dp"
android:text="Edit Animal"
android:textAppearance="?android:attr/textAppearanceLarge"
android:textColor="#FFFFFF" />

<RelativeLayout
android:layout_width="match_parent"
android:layout_height="match_parent"
android:background="#FFFFFF"
android:orientation="vertical"
android:padding="10dp" >

<TextView
android:id="@+id/textView2"
android:layout_width="wrap_content"
android:layout_height="wrap_content"
android:layout_alignParentLeft="true"
android:layout_alignParentTop="true"
android:layout_marginLeft="24dp"
android:layout_marginTop="30dp"
android:text="Task" />

<EditText
android:id="@+id/animalName"
android:layout_width="wrap_content"
android:layout_height="wrap_content"
android:layout_alignLeft="@+id/textView2"
android:layout_below="@+id/textView2"
android:ems="10" >

<requestFocus />
</EditText>

<Button
android:id="@+id/button1"
android:layout_width="wrap_content"
android:layout_height="wrap_content"
android:layout_alignLeft="@+id/animalName"
android:layout_below="@+id/animalName"
android:layout_marginTop="19dp"
android:onClick="editAnimal"
android:text="Edit" />

<Button
android:id="@+id/button2"
android:layout_width="wrap_content"
android:layout_height="wrap_content"
android:layout_alignBaseline="@+id/button1"
android:layout_alignBottom="@+id/button1"
android:layout_centerHorizontal="true"
android:onClick="removeAnimal"
android:text="Delete" />

</RelativeLayout>

</LinearLayout>
Editanimal.java
package com.javapapers.android.sqlitestorageoption;

import java.util.Calendar;
import java.util.HashMap;
import android.os.Bundle;
import android.util.Log;
import android.widget.DatePicker;
import android.widget.EditText;
import com.javapapers.android.sqlitestorageoption.R;
import android.app.Activity;
import android.content.Intent;
import android.view.Menu;
import android.view.MenuInflater;
import android.view.MenuItem;
import android.view.View;

public class EditAnimal extends Activity{
	EditText animalName;
	DBController controller = new DBController(this);
	@Override
	public void onCreate(Bundle savedInstanceState) {
		super.onCreate(savedInstanceState);
		setContentView(R.layout.activity_edit_animal);
		animalName = (EditText) findViewById(R.id.animalName);
		Intent objIntent = getIntent();
		String animalId = objIntent.getStringExtra("animalId");
		Log.d("Reading: ", "Reading all contacts..");
		HashMap<String, String> animalList = controller.getAnimalInfo(animalId);
		Log.d("animalName",animalList.get("animalName"));
		if(animalList.size()!=0) {
			animalName.setText(animalList.get("animalName"));
		}
	}
	public void editAnimal(View view) {
		HashMap<String, String> queryValues =  new  HashMap<String, String>();
		animalName = (EditText) findViewById(R.id.animalName);
		Intent objIntent = getIntent();
		String animalId = objIntent.getStringExtra("animalId");
		queryValues.put("animalId", animalId);
		queryValues.put("animalName", animalName.getText().toString());

		controller.updateAnimal(queryValues);
		this.callHomeActivity(view);
	}
	public void removeAnimal(View view) {
		Intent objIntent = getIntent();
		String animalId = objIntent.getStringExtra("animalId");
		controller.deleteAnimal(animalId);
		this.callHomeActivity(view);
	}
	public void callHomeActivity(View view) {
		Intent objIntent = new Intent(getApplicationContext(), MainActivity.class);
		startActivity(objIntent);
	}
}
Now we have a database! Ho – Ho – Ho! Go ahead and launch this app and enjoy access to SQLite database in Android.

0 comments:
Post a Comment