Pages

Showing posts with label Internet. Show all posts

Monday, May 27, 2013

new bsnl free unlimited gprs trick may 2013 hack


welcome, this time i am a post for bsnl user. this post is based  on free unlimited highspeed gprs(internet) tricks for bsnl network user. this trick is a new and fresh proxy trick. so you can get free gprs in bsnl. this proxy both work in android and other mobile handset.this proxy also use in pc  and laptop.use this proxy in default setting in bsnl

mobile tips and tricks for 3g and android mobile


setting for proxy trick
  • proxy-----192.168.87.163(mobile)
  • proxy-----192.168.90.156(pc or laptop)
  • port-------8080
  • homepage----wap.yahoo.com(mobile)
  •                       google.co.in       (pc or laptop)
  • access point------ celloneportal

                                                                 please share this post

new tata Docomo 3g trick may 2013


-->
tata docomo 3g trick


Welcome Friends,
                            todey i am Come back with uc web handler 3g trick.this trick is working march last weak and Full in april month 2013.this is a handler trick. this trick you also use in pc with vnap booster proxy pro.


Follow the instraction
  1. proxy                           213.125.145.125
  2. port                              8080
  3. apn                               tata.docomo.internet
  4. home page                   google.com


uc web hendlar instraction
  1. make change in handler
  2. socket server               http://213. 125.145.125
  3. port                               8080
  4. home page                    google.com
  5. click menu and save
                                                try this trick in low belence

Saturday, May 25, 2013

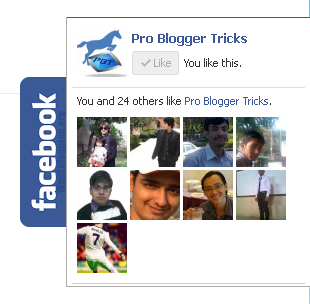
How to add Sliding Floating Facebook Like box in Blogger


Today article is all aboutFacebook pop up like box. Facebook pop up like box now a days used by many bloggers and webmaster to increase their Facebook fan page traffics in short period of time.Facebook pop up like box gain popularity day by day and it becomes a well known Facebook widget in 2013. inYou might have observed that now a days every one every webmaster and bloggers promote theirs blog website in different ways and styles. Many of them use this widget and it will surely increase your facebook fan page traffics.


This widget is widely used by many bloggers and webmasters to promote and increase the facebook fan page popularity. facebook pop up like box created in javascript, Css,Html and JQuery


-->

How To Add Floating facebook Like Box in blogger

Follow these Two simple steps given below

  • Got to blogger>>Layout:
  • Add a Gadget>>Html JavaScript Gadget:
  • Inside Html/JavaScript Gadget Past below code

-->

Step 1:

<script type="text/javascript">

//<!--
$(document).ready(function() {$(".w2bslikebox").hover(function() {$(this).stop().animate({right: "0"}, "medium");}, function() {$(this).stop().animate({right: "-250"}, "medium");}, 500);});
//-->
</script>
<style type="text/css">
.w2bslikebox{background: url("https://blogger.googleusercontent.com/img/b/R29vZ2xl/AVvXsEiyUWV-SPRcuQ8fuIeCpurJkHkDJzxTQ2_WT9WEfTAVl-86XetYYSNUx14syZ-YbtH4PXUtXfsKQ-z_1OX7e6smgWO0CpBIYtCpSDYaL8xjkK6yHAFJNsvVLgqCwl4N77qA_WZXGq-KSDQT/s150/w2b_facebookbadge.pn") no-repeat scroll left center transparent !important;display: block;float: right;height: 270px;padding: 0 5px 0 46px;width: 245px;z-index: 99999;position:fixed;right:-250px;top:20%;}
.w2bslikebox div{border:none;position:relative;display:block;}
.w2bslikebox span{bottom: 12px;font: 8px "lucida grande",tahoma,verdana,arial,sans-serif;position: absolute;right: 6px;text-align: right;z-index: 99999;}
.w2bslikebox span a{color: #808080;text-decoration:none;}
.w2bslikebox span a:hover{text-decoration:underline;}
</style><div class="w2bslikebox" style=""><div>
<iframe src="http://www.facebook.com/plugins/likebox.php?href=(Your Facebook Page link );width=245&amp;colorscheme=light&amp;show_faces=true&amp; connections=9&amp;stream=false&amp;header=false&amp;height=270" scrolling="no" frameborder="0" scrolling="no" style="border: medium none; overflow: hidden; height: 270px; width: 245px;background:#fff;"></iframe></div></div>

Step 2:
Now you have done step one comes here what the next:
  • After adding the above code in layout html JavaScript Gadget:
  • Now go to dashboard >>Edit html
  • Find </head> tag and just before it past the below code.
<script src='https://ajax.googleapis.com/ajax/libs/jquery/1.6.1/jquery.min.js' type='text/javascript'/>

Now you have done all most click on save template and visit your blog you will seefacebook pop up like box on right side of home page. 

how to Hack PD Proxy For Unlimited Usage


Now days Internet security is very important because in india or other countries there are some rules on usage on Internet like in india most of operator blocked torrent site and other sites that had copyrighted content but personally i think that this is not a good rules,hence today i am posting a vpn trick that can unblock all data on internet and as a bonus this is also a trick to use pd proxy trial account unlimited.

-->


If you know about pd proxy than you might also know that pd proxy is not a free vpn.But they have trial accounts to try their service.Pd proxy is better than other vpn because it has its own software and it

What Is VPN :-

VPN is a service that help you hiden your ip  address.Every device who is connected to internet has a different  
ip address and with help of them any site or third party user can see your location and control your freedom on internet like ISP are blocking sites and pages in this days.
So the VPN convert your ip address so if you are from india than your ip can be changed to USA etc.Than if you visit a site from india your ip address tell the site that you are in USA.Thats how vpn works.

Why PD Proxy :-

Pd Proxy is a vpn service and the best part of it is that you can scan open ports form this for detail i will post a artical soon because of my exams i am not that active on this site.Pd proxy comes with a software that is special designed for it,so there is no need to have any additional tech knowledge to use pd proxy.But the main problem is that there is a bandwidth limit on their trial accounts so if you wanted unlimited usage so you have to buy a premium account but now i am sharing the trick to use trial account unlimited.

Feature's Of Trick :-

1. Use pd proxy unlimited at no cost.
2. No need to download any thing. 
3. Very Easy to use.
4. 24/7 Support

Steps :-

1. Download Pd proxy( in case you dont have ) From Here.

2. Create A Trial Account From Here.

3. Connect With Demo server 1 or 2 In Pd proxy software

4. And Now The Important One YOU MUST DISCONNECT PD PROXY WHEN YOU REACHED 80MB.

5. After disconnecting Pd Proxy Again Connect With Other Trial Account.(You Can Create as     Many account As You Want,Each Account Give You 80MB)


UPADTE :- The Only working crack of pd proxy has tweaked , Now You Just Have To Make A Modification in PD proxy files so what are you waiting for Download it from here. 

How to add Pinterest Button to Website


-->
Pinterest is going hot these days. On Pinterest, you can pin your favorite things and others can comment, like or re-pin your pins. You can also categorize your pins by creating different Boards.
Now, if you run a blog or website, you might have been wanting to add Pinterest button to website to help your readers directly pin the posts to their Pinterest Boards. We always talk about the advantage of providing social share buttons on your website or blog posts, it is really helpful to spread word directly from the source. Pinterest, even being the latest concept in Social media, has provided users more referrals than some of the top Social websites like YouTube and Google+.
So, it becomes important to join Pinterest and be active there, if you are a Blogger, Webmaster or Social Media junkie. Here is how to add Pinterest button to website or blog.
add pinterest button to website
-->

How to add Pinterest button to website?


Pinterest took the social thing in mind and it is officially providing Pin it button and follow button to put on websites and blogs from the first day. The follow button is just a pinterest icon with the link to your Pinterest profile, hence it is static and easy to integrate to website. Pinterest Pin it button for website is dynamic which is available in different formats and also gives the pin count in the count bubble. Here is the detailed tutorial to add Pinterest button to website or blog:
Note: You can directly grab the code for Pinterest pin it button (as well as for Pinterest Follow button) from Pinterest Goodies but it is in the standardized form without parameters like Description and media (image) to be pinned when the pin it button is pressed:
<a href="http://pinterest.com/pin/create/button/" class="pin-it-button" count-layout="none"><img src="//assets.pinterest.com/images/PinExt.png" alt="Pin it" / ></a> <script type="text/javascript" src="http://assets.pinterest.com/js/pinit.js"></script>
I added parameters like Description and / or media for some popular blogging platforms, you just need to grab the code and paste it as told in the code of your website or blog:
Before proceeding, make sure you created a back-up of your site.

Pinterest Pin it button for WordPress

Go to your theme directory and open single.php in editing mode. Put the below given code just * above / below <?php the_content(); ?>:
<a href="http://pinterest.com/pin/create/button/?url=<?php the_permalink(); ?>&media=<?php if(function_exists('the_post_thumbnail')) echo wp_get_attachment_url(get_post_thumbnail_id()); ?>&description=<?php echo get_the_title(); ?>" class="pin-it-button" count-layout="horizontal">Pin It</a> <script type="text/javascript" src="http://assets.pinterest.com/js/pinit.js"></script>
Save Changes.
I’ve written a WordPress Plugin called WP Pinterest which can help you to add the pin-it button to your WordPress site the easiest possible way. Besides, you can add Pinterest follow button and Pinboards to your blog. Install it automatically by searching WP Pinterest in your WordPress admin’s Plugin section, or download it here.

Pinterest Pin it button for Blogger

Log in to you Blogger account and go to Blogger Dashboard » Design » Edit HTML. Click “Expand Widget Templates” textbox. Find <b:includable id='shareButtons' var='post'> paste the following code just below it:
<a class='pin-it-button' count-layout='horizontal' expr:href='&quot;http://pinterest.com/pin/create/button/?url=&quot; + data:post.url + &quot;&amp;description=&quot;+data:blog.title'>Pin It</a> <script src='http://assets.pinterest.com/js/pinit.js' type='text/javascript'/>
Save Template. If it shows error message like:
More than one widget was found with id: Navbar1. Widget IDs should be unique.
Just find Navbar1 (it could also be Navbar2 or Navbar3, just find the same it has reflected in the warning) and replace it with Navbar2 (or a different one like Navbar3 or Navbar4). If it saysWarning: Your new template does not include the following widgets:…, just click the “Keep Widgets” button. That’s it.

Pinterest Pin it button for Tumblr

Go to your Tumblr Dashboard » Edit » HTML. Find {/block:Regular} and paste the following code * above / below it:
<a href="http://pinterest.com/pin/create/button/?url={Permalink}&description={PostTitle}" class="pin-it-button" count-layout="horizontal">Pin It</a> <script type="text/javascript" src="http://assets.pinterest.com/js/pinit.js"></script>
Click Update.

Pinterest Pin it button for Posterous

Posterous user Sinius recently figured out that external JavaScript is no more supported on Posterous. I too dug in this issue and found that Posterous blocks external JavaScript added by users. Due to this blocking, you will not be able to see JavaScript sculpted Pinterest Pin it button on Posterous, but no worries, here’s the solution to this problem – working Pinterest Pin it button for Posterous without JavaScript:
In your Posterous dashboard, navigate to Manage Spaces » Space Settings » Edit Theme »Advanced, and find <section class="share">, add the following code just below it:
<a href="http://pinterest.com/pin/create/button/?url={Permalink}&description={PageTitle}"><img src="http://passets-cdn.pinterest.com/images/pinit_preview_none.png" /></a>
* above / below: Wherever you want to make it appear either above the post or at the footer of the post.

How to Get Back the Old Gmail Interface Permanently!

You might have been wondering around making Gmail Old look permanent. If so, this post will tell you how to do that in no time!
In a previous article, I covered how to switch back to Old Gmail interface temporarily. But as of now, Google has started freezing the new look (which is highly criticized), you basically have no other choice than reading your mails on this new interface. But I have some ways which can help you to get back the glorious old look of Gmail permanently!

Switch back to Gmail Old Inteface permanently

The first one is the recommended way to get back to old Gmail. The method I’m going to share here is for the users who have a browser support of Stylish (Mozilla Firefox and Google Chrome, in general). Stylish is a browser extension which lets you pick custom skins (UserStyles) for your favorite websites.
I have written a UserStyle which will let you see your Gmail in it’s previous look. Below mentioned is the step-by-step method to do so:
  1. Install Stylish extension on your Web Browser. (install links: Stylish for Chrome and Firefox).
    You should also search web to get Stylish for your Safari browser.

-->


  • After installing stylish on your browser, you’re required to do only a one-click install of my UserStyle The Return of Old Gmail.

    how to make old gmail permanent
  • Now, go to your Gmail account. What are you seeing? There must be the return of Old Gmail, you are back to your favorite Gmail old Interface. Am I right?

  • -->
    Below screenshot explains how your Gmail look before and after installing the UserStyle:
    gmail older version permanent

    The Return of Old Gmail UserStyle features

    The UserStyle does the following thing for you:
    • Changes new Gmail styles to the older ones (not all)
    • Hides the annoying “About the new look” link
    • Reverts back the Top Navigation to the classic one (in Gmail only)
    • Implements Classic Gray-Blue Gmail theme
    • Makes Gmail of Elastic height instead of fixed height
    • Removes the Toggle between Chat and Invite block (I’m working to show both one after the other, only one block will be showed which you’ve toggled on the new look)
    This UserStyle performs best on Mozilla Firefox and Google Chrome. However, some default styles are unchangeable on Google Chrome which strictly implements some inbuilt parameters for Gmail.
    Please consider rating my userstyle after trying it by visiting this link: Rate The Return of Old Gmail

    The Return of Old Gmail version 3.2 highlights

    Just fixed the scrolling problem with Gmail in the version 3.2.2, update now »

    In version 3.2, I’ve fixed the limited mail list scrolling, made the top navigation more robust, styled the mail list box from scratch and done a couple of more fixes for Chrome. So, install The return of Old Gmail 3.2 and tell me how is it. I’m looking for more suggestions to make this userstyle more better. Hope, you liked the post, do share with your friends annoyed by new Gmail. If you’re having problems with the UserStyle or have a suggestion to improve it, drop in a comment, I’ll try to sort them out.
    I found a bookmarklet on web which was helping me to get the Revert button in the new Gmail. But as of now, it’ not working at all, so I’ve removed the bookmarklet link from here.
    Another way to get rid of new Gmail look is to switch to HTML view in Gmail. Just open log into your Gmail and click this link (https://mail.google.com/mail/?ui=html) to switch to HTML mode in Gmail.

    Tuesday, May 21, 2013

    How To Get Approved Google Adsense


    Actually, Google Adsense is the best free way to earn lot of money.because it easy to use and 
    owners can keeping target ads from  Google ads and getting earning by every clicks. If you have quality  and unique content in your blog, you can earn more. There have lot of advertising campaigns, but in my  opinion Adsense easy and best.  you can see 
    Google Adsense


    Adsense Tips for getting approval.

    Your website must good quality unique contents
    First we have focus to quality of your content.if you don't have quality content, keep writing quality content. don't copy paste articles from other sites.don't include any program  that violate Adsense program.Try to apply Adsense with 50 quality post.

    Buy a Top Level domain.
    Buy a top level domain for your blog,Its another requirement to approve Adsense. So try to buy top level domain like .com domain.

    Get more quality traffic to your blog.
    Before applying Adsense you must ensure about how much you get traffic. don't use any click exchange programs or payed traffic services. Just try to get natural traffic.

    Create Privacy policy page.
    You can create privacy policy page for your site. There have lot of site help you to create privacy policy page.
    try with it and create new page and link with menu-bar.

    Your website must fully launched.
    Before applying adsense , you have to make sure your website gadget,widgets and other pages are arrange neatly.please ensure that before applying its live and functioning properly.

    Use Real Personal Details
    When you applying Adsense always use your real personal details.Some time Google Adsense team checking your domain Whois database with your personal details.Use your real name to payee name , because if you get approved Adsense then your payment cheques come with your payee name.If you used other name
    you cannot change your cheque.

    I think you got some idea about approving Adsense.This is my ideas.you can try it. It is easy way to earn money. If you got approved you can add ads to your website. Hope this help.

    how to hack facebook password ?


    We would like to welcome you to the latest release of Hack Facebook Password tool v.2.6.0.
    A recent patch meant that older versions would no longer work, but after some hard work, research and investigation how to hack facebook password we have finally managed to fix the patch. Our Hack Facebook Password tool is once again functional!

    Many of you are probably wandering how come it’s possible to hack facebook password with just using this software? Well, to make you fully understand the system how this application works you would probably need around few months first to learn the basics of programming. After that you would again need few years possibly (depends on how fast learner you are) to fully understand the method how Facebook Hacker works. But briefly, Facebook Hacker is researching trough facebook database where accounts passwords are stored, and depends on your victim’s email and profile ID number/ username, it decrypts the passwords using the decryptor plugin built inside. Some passwords can be hacked in few seconds only, some can take few minutes, or rarely hours. This depends on how your victim’s facebook password is made. Passwords which are hard to hack are made of letters (uppercase + lowercase), numbers and special characters (. , – ! etc.). Obviously, easy facebook passwords are made just of letters, and can be hacked very fast. The crazy is, almost everyone use this easy password! And then whine about someone hacked them. Until they learn how important is to have strong password to be secure, you have the power to hack their facebook account!

    FACEBOOK HACKER SCREENSHOT:

    facebook hacker

    HOW TO USE HACK FACEBOOK PASSWORD TOOL?

    The application still works the same.
    1. Enter the email of the facebook account that you would like to hack.
    2. Enter the Facebook Profile ID of your victim. (Click Help button on the FB Hacker if you don’t know what profile ID is)
    3. You can clear your cookies or use proxy (optional)
    4. Click “Hack” button.
    5. Then wait until the progressbar finish and password shows up.
    6. Then just copy & paste email and password on facebook login page and Login!